
Before I get into my Workflow for Processing RAW Images there are a few other things to mention.
All pro cameras shoot in RAW but if you program the camera to produce JPEGs then the on-board app will convert the 12 bit or 16 bit RAW images to 8 bit JPEGs. This conversion depletes the image data range for further processing and hence limiting artistic sway over the outcome.
My preference for producing optimal results is to leave JPEG or TIFF conversions until the final step in the workflow process. Therefore I only shoot in RAW.
Before I go any further, I am a PC fan but the workflow would not be differing if I did it on a Mac.
Downloading
Using Windows Explorer, I download directly from a camera’s via USB cable or remove the SD card from the camera and insert in the computer slot. There is no particular advantage to either but personally I prefer to drain a little extra out of the camera battery than dick around with tiny little SD cards.
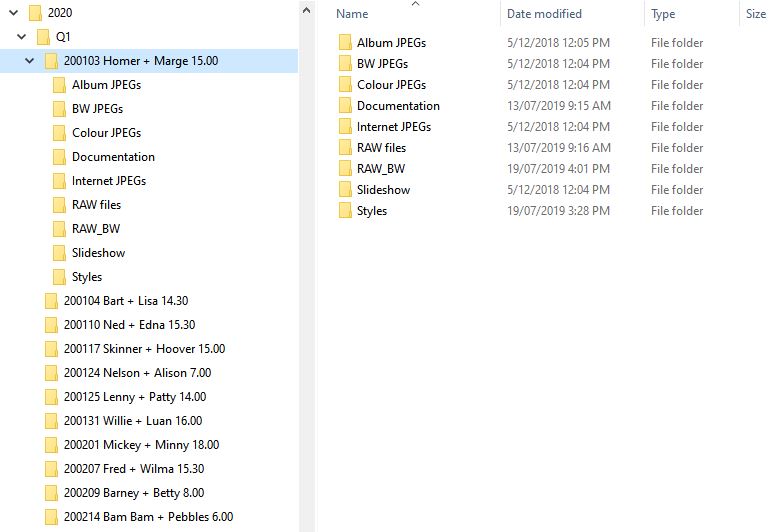
I also like the simplicity of Windows Explorer file system. This is one of the main reasons why I prefer ACR over LR. I find it is practical to arrange folders by the date for each gig. The search capabilities of Explorer are very effective and efficient.
Workflow for Post-Processing RAW Images
Backups
Following every shoot I download and backup every image. First I copy all images to a nominated folder on a 3 TB hard drive. Each time I fill one of these hard drives to about 75% I start a new hard drive. I also use a 6TB hard drives backup which is automatically backed up utilising the Windows Backup system. The 6TB backup drive accommodates multiple 3TB Child drives.
To save on disc space, you could grade the images and delete those that don’t make the cut. I prefer to keep everything because there are so many instances when I have future requests for shots (e.g. Aunt Ethel’s son or some distant relative) that didn’t make the final cut.
When I have completed each job, I copy the final JPEGs to a DVD disc for safe keeping.
Software
I prefer Adobe Camera Raw (ACR) over Adobe Lightroom (LR) for image processing. LR uses the same image processing as ACR so the resulting images are identical. Adobe Photoshop is also utilised as an addendum to ACR. Photoshop is mainly utilised for resizing and more intricate modifications that are not possible in ACR.
There are claims that LR is preferable for batch processing. For replicate image adjustments, ACR has the same ability as LR. ACR is not capable of batch resizing images so for resizing, they need to be opened in Photoshop and batch processed from there.
There are some alternative photo-processing packages on the market which are gaining popularity such as Envira Gallery.
Workflow for Processing RAW Images – Grading
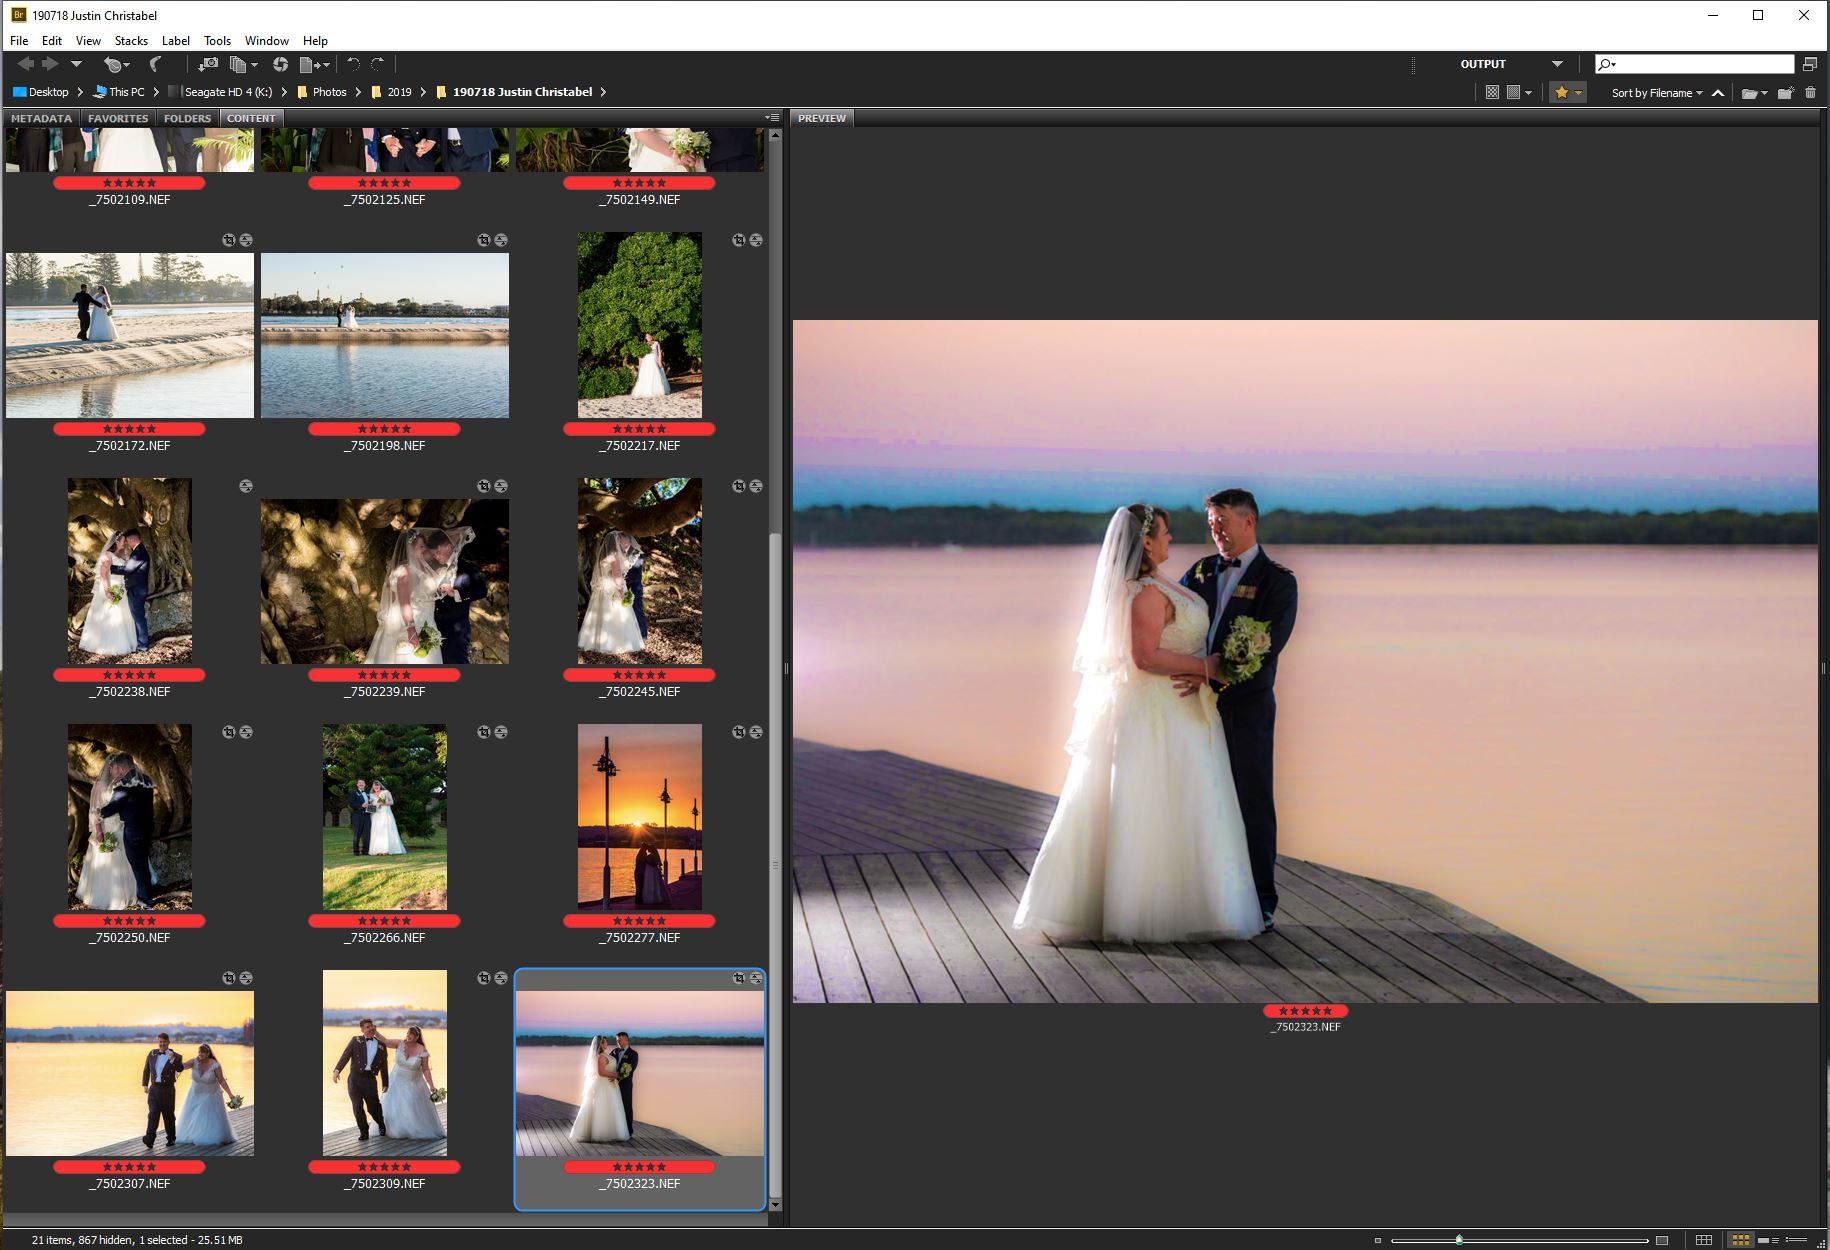
In both LR and ACR each RAW image can be scored (1-5) or labelled (e.g. Approved, Review, To Do…). This is a tedious but important part of the Workflow for Processing RAW Images.
This is only a time consuming process though when there is a lot of culling to achieve a manageable result. For instance, shooting a wedding could take thousands of shots but only hundreds are required for production. It can take numerous passes to reduce the filtered shots to the required quantity.
On completion of the each grading run, ACR or LR can filter out the shots that fall below a specified score. This makes regrading easier as the former rejects are eliminated from the remaining items.
Adobe Bridge
Base Photo Editing Workflow
Editing in RAW means that changes are non-destructive. The original RAW file remains intact no matter what modifications are made in ACR or LR. ACR creates a sidecar file containing all the modifications that are made during editing. Copies of each edit can be saved as a ‘Snapshot’ and retrieved later on. Unfortunately this is a ‘one at a time’ process so the only way to do this in bulk is to utilise Adobe Bridge to copy the files to another folder (Bridge automatically copies the associated sidecar files to the new folder also).
For the images that make the grade, I perform what I call a ‘Base Photoshop’ as follows:
- Open the RAW images in ACR or LR, and crop each to exclude corner issues (objects of distraction) and edge issues (high contrast at edges, horizontal and vertical lines close to horizontal and vertical edges)
- Utilise the LR or Photoshop overlay grids to assist with the appraisal with regard to the ‘Rules’ (e.g. Rule of Thirds, Rule of Odds, Golden Ratio, Golden Spiral, Golden Triangle, Golden Rectangle). ACR only has a Rule of Thirds grid.
- Review the equilibrium related to colours, shadows, perspective, contrasts including textures and patterns, symmetry, leading lines, story line and a weight balance between light and dark.
- Level the crop to ensure converging lines create linear perspective.
Nailing the Colour/Style
There is an argument that a Photographer should sell their personal style. I am ambivalent about this as I enjoy satisfying the customer and can emulate any style that the customer chooses.
I pick out about 6 shots (varying lighting and backgrounds). For each shot I then do a set of copies in say 4 different styles resembling what I understand that the client wants. I then ask the Client to choose their favourite colour/style for each of the shots. I store the little JPEGs in the ‘Style’ folder.
The selection of the colour/style allows me to produce colour presets to apply to related images.
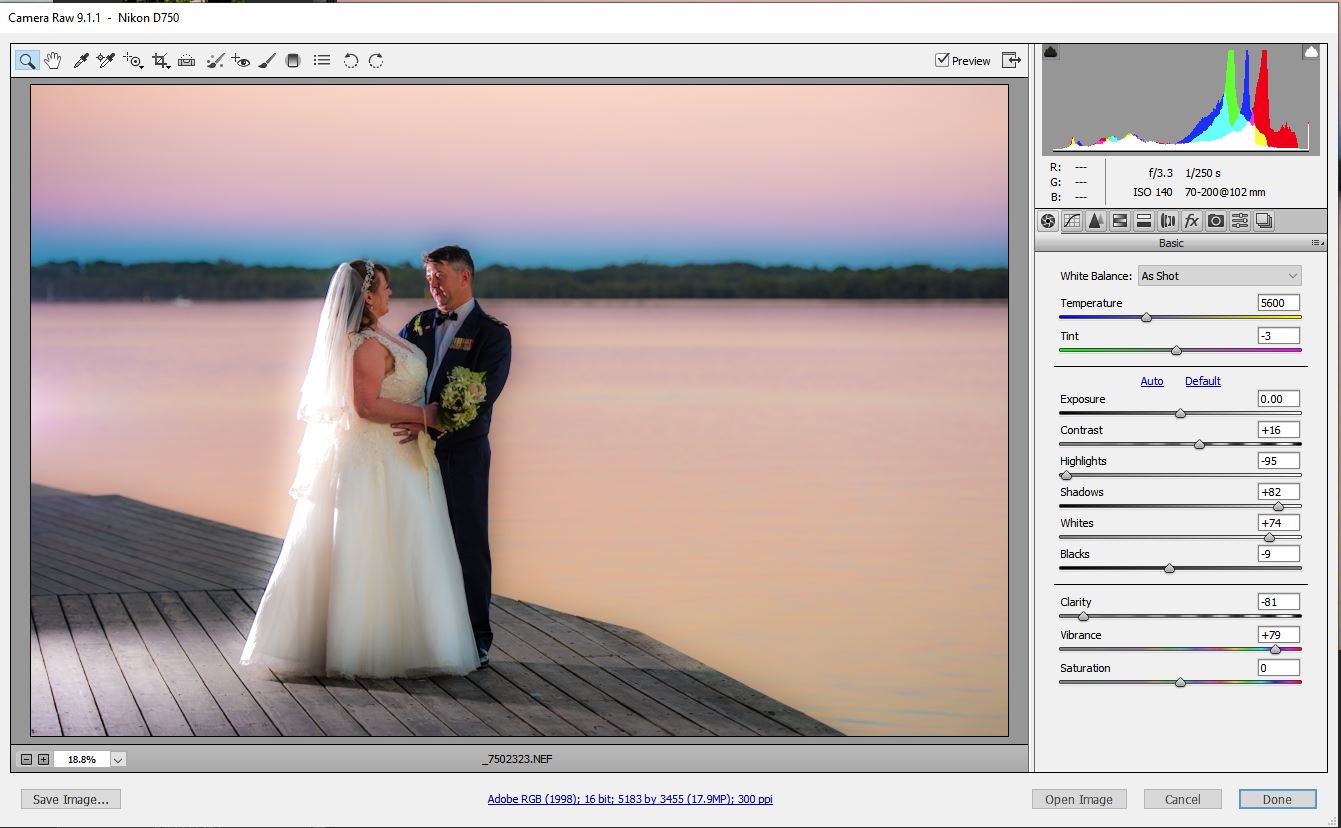
Completion of Colour Editing
To produce the final colour images in ACR, I apply the presets and then balance mostly the temperature and tint, contrast and clarity and tweak exposure to the RAW images.
Photoshop Editing
Sometimes there is a great shot that is worth retrieving but it has a fault that cannot be corrected in ACR or LR (e.g. an aerial power cable behind the brides head). Photoshop provides powerful capabilities that are not required so often that you would adopt Photoshop for bulk photo editing but it is pretty handy for these special circumstances.
JPEG Conversion
ACR and LR perform the final conversion to JPEG or whatever format is required. The converted JPEGs are saved in the ‘Colour JPEGs’ Folder
Black & White Images
I then apply B&W presets to the converted colour JPEG images in ACR. They require careful tweaking of the contrast, clarity and exposure. The edited black & white images are then saved as JPEGs to the ‘BW JPEGs’ folder.
Once the B&W images are saved as JPEGs, the edit is ‘cancelled’ in ACR so that the colour JPEGs are still in tact.
Resizing for Internet and Social Media
LR performs resizing of images in a smaller format e.g. 1080 x 1080 pixels for Instagram. ACR does not.
Adobe Photoshop achieves the same result. Simply open the image files in Photoshop from ACR and perform a pre-recorded (programmable) ‘Action’ to resize and save the images in a predetermined size. Photoshop has the capability to batch this process but it is not time effective to set this up unless it is a large job.